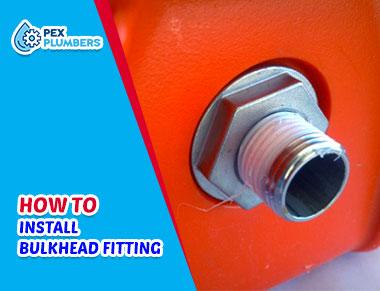
A bulkhead fitting is quite an important part of your plumbing system. This is the part that connects pipes to the tank. These fittings are specially designed to allow the free flow of water or any kind of liquid in tank drainage.

If the bulkhead fitting is not properly installed, your entire plumbing system could fail.
Unable to install the bulkhead fitting can sometimes cause low water pressure, leaks, and water blockage as well.
How to install bulkhead fitting to get rid of all of these issues? Don’t worry, we have got all of the steps that you need to follow to install this vital part of your plumbing system accurately.
So without further ado let’s get started.
Important Terms And Features You Should Know About

Before you start the insulation process, here are a few terms and features that you should know about.
1. Tightening The Nut
When you tighten the nut, you should tighten it to a point where the o-ring seal is in touch with the tank wall. It shouldn’t be too tight, and shouldn’t be too loose. For example, if you are using a pipe size of 3 to 4 inches, You should tighten the unit to 1/3 of a turn.
2. Inserting The Fitting
If you are installing the bulkhead fitting inside the tank, the entire thing along with the o-ring should be set up from the inside of the tank.
3. Tank Wall Hole
The diameter of the tank wall hole should be a maximum of 1/34th inch greater than that of the nominal body. You should not drill a hole more than this as then the O-ring will not settle in properly and will be loose.
4. Sealing The Surface
When you are sealing the surface of the o-ring, it should be free of any ridges and sharp edges. There should also not be any deep scratches. A good standard is to have a 20 micro-inch finish on the surface.
What Is A Bulkhead Fitting?

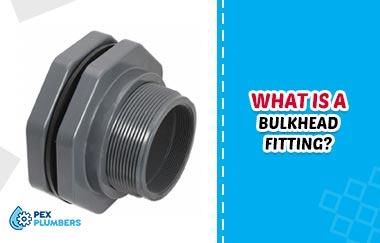
As we have mentioned before, this fitting is a part that allows the free flow of water from a tank. It is also a fitting that allows the drainage of a reservoir or tank through a hole.
The bulkhead fitting helps create a seal that avoids leakage. There are three main parts to a bulkhead fitting- the body of the bulkhead, the gasket, and a nut which is the part that helps attach the unit to the tank.
How To Install Bulkhead Fitting? Step by Step Guide

Here are all of the steps that you need to follow to install a bulkhead fitting into a reservoir properly without getting any leaks-
Step 1: Cut A Hole
The first thing that you won’t have to do is get a hole through which the bulkhead fitting will pass through. This hole has to be the same as the exterior diameter of the bulkhead fitting.
Remember, you should start with a small hole and then expand it slowly. Although you can always make the hole bigger, making it smaller again will be quite difficult.
Step 2: Pass The Bulkhead Through The Hole
Next, you will fast about head through the hole so that it fits tight around the threads.
It shouldn’t be too tight that it cannot be turned, and shouldn’t be too loose that it causes leaks.
When inserting the bulkhead, it is better to insert it from the outside. This way, the head of the bulkhead is placed on the exterior of the reservoir while the threads remain inside.
Step 3: Fit The Gasket
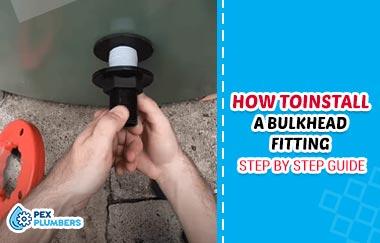
Now, you have to pass the gasket into the fitting through the inside of the reservoir.
An easy way to do this is to slide the gasket upright on the reservoir wall and then add the nut. When tightening the nut, make sure that it isn’t too tight. A lot of people recommend only hand tightening the nut.
If you are dealing with a reversely threaded bulkhead nut, it means that turning it left will make it tighter. It’s nothing to be confused about.
Thread the nut tightly and make sure there is no space for leaks. After that, you can add any kind of fitting onto the internal threads of this bulkhead. It will work to create a flow from the reservoir.
Frequently Asked Questions
1. How Does A Bulkhead Work?
A bulkhead works in a very simple way. While the water comes through the bulkhead, as the level rises, the water is passed on to the land side from the waterside. This is how the unit works to empty reservoirs or to act as a connector for tanks.
2. Should A Bulkhead Fitting Be Too Tight?
A bulkhead fitting should not be too tight. This is because it can be quite hard to remove afterward. Just make sure that the fitting is quite snug so that there is no leakage.
3. What Size Bulkhead Should I Purchase?
This will depend on the other fittings of your plumbing system. But as an example, a 1-inch ABS bulkhead can fit through a maximum hole size of 68 mm and a minimum hole size of 42 mm.
So the size of the bulkhead that you purchase will depend on the hole size and other fittings.
4. How To Know If The Bulkhead Has Been Connected Properly?
A good way to check whether the bulkhead has been installed properly is to run the water and check for leaks. If there are no leaks, the bulkhead has been installed correctly.
Final Words
Now that you know how to install bulkhead fitting, you won’t be having any problems with leaks. This is a very basic part of the plumbing system that is quite easy to install on your own at home.
You just have to be very careful when tightening the nut and making the hole. If the hole is too big, there will be leaks. If you can get this part right, the other steps are quite easy.
Recent Article:
- Pex Bend Support Vs Elbow
- How To Rough In A Double Sink Vanity With 5 Easy Steps
- Remove A Broken PVC Fitting From A Threaded Pipe
- How do you use a manual drain snake auger?

Hey! I’m Leanda Bailey. I’m here to explain every plumbing installation and repair you may have in your kitchen or bathroom. Also, I’ll try to find you the best products on the market for your plumbing work.

