If you’ve opted for installing a plumbing or heating system using PEX tubes, then a crimp tool is probably one of the first tools you’ll need to make secure PEX connections.
When done right, these tools effectively secure in crimp rings, enabling you to make leak-proof connections to your PEX fittings.
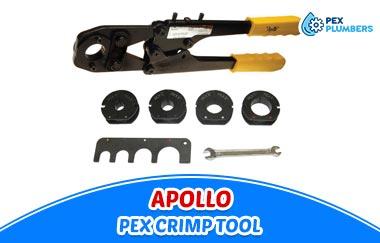
Apollo crimp tools are one of the most popular choices of many users, both DIY-ers and professionals for all the right reasons.
Now when you’re a pro, you probably know the ways to work your tool. But for those of you just testing the waters, today we’re all about how to use Apollo PEX crimp tool so that you can get on crimping like a pro in no time!
How To Use Apollo PEX Crimp Tool
Whether you’re working with the regular crimp tool by Apollo or their angle crimp tool, the process is virtually the same as follows:
- Commence by first cutting the tube as straightly or squarely as possible to ensure a smooth cut and get rid of any burrs.
- Slide the crimp ring of your choice on the PEX tubing.
- Next, insert your desired fitting into the PEX tube until it no longer slides in.
- Now place your crimp ring near the end of the PEX tube at a distance of 1/8-1/4 inches away from the tubing end and fitting ribs.
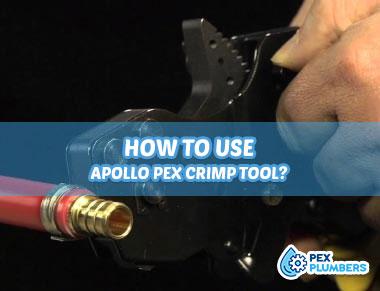
- Take your Apollo crimp tool and place the jaws on the crimp ring.
- Press the handles of your crimp tool together until you feel resistance.
- With a Go, No-Go gauge scaling tool, ensure that the crimp ring has been pressed properly and securely. If not, remove the crimp ring and start over with a new crimp ring.
1. Apollo Quick Pinch Clamp Tool
Crimp rings and clamp rings provide the same function but unlike crimp rings, you’d need a Quick Pinch Clamp tool for clamp rings. When using this tool by the brand Apollo, the following are the steps to follow:
- As usual, cut the PEX tube evenly with a clean finish and remove burrs if any.
- Slide over your clamp ring over the PEX tube and attach your fitting.
- Now, take your pinch clamp tool and place its jaws around the nub of the clamp ring.
- The tool now needs to be ratcheted until the clamp tool releases automatically. This auto-release feature ensures the full engagement of the clamp ring.
- Finish off by pressure testing the fitting assembly before installation.
2. PEX One Hand Pinch Clamp Fastening Tool
- After you have cut your PEX and placed the pinch clamp ring over it and attached the fitting, place the jaws of your clamp fastening tool around the nub of the clamp ring.
- The clamp now needs to be ratcheted 7 times until the LED light on your tool turning on. This confirms the full engagement of your clamp ring.
- Now, you have to rotate the tool’s release lever at the side of your Apollo tool to release it.
How To Calibrate Apollo PEX Crimp Tool
Luckily for you, Apollo crimp tools already come pre-calibrated and are good enough to be used for around 10,000 crimps.
In order to enjoy their performance to the fullest, you’d need to recalibrate these tools after 10,000 crimps have been made. Even if you haven’t crimped this many times, recalibration is mandatory after every year for making the most of these Apollo gears.
1. How To Adjust Crimp Force
- For adjusting the crimp force of your device, open up the handle of your crimp tool, locate one of the nuts that has numbers around it and loosen up this nut.
- Now, press on to the screw and rotate it in order to decrease or increase the number as you desire. a larger number resembles increased force and vice versa.
- Once you have set up your desired force, replace the screw back to its initial place and rotate the nut to tighten it up.
If your Apollo tool has the screws on the side, you’ll find three screws:
- An adjustment screw
- Middle screw, and
- A set crew.
This set screw is to be loosened prior to making adjustments and tightened again after adjustment is over.
You may also like – 7 Best PEX Crimp Rings in 2023 – Reviews & Buyer’s Guide
2. How To Replace Crimp Heads
For different diameters of PEX tubing, it is natural that you’ll need different sizes of crimp heads on your crimp tool. Follow the steps below to do so properly:
- Press on the handle in order to fully open the jaws of your crimp tool.
- You’ll find a side-release spring at the side of the crimp tool jaws, which needs to be pushed upward until the hook reaches above the pin of the jaws.
- You can now easily slide out the crimp head off the jaw to remove it.
- Make sure you are still pushing upward on the side-release spring. While doing so, slip in the replacement crimp head in the empty jaw.
- Release the pressure on the spring release and allow the crimp head to automatically lock in place in the Apollo crimp tool jaws.
3. How To Adjust Crimp Diameter Of Angle Crimp Tool
- Check for the initial value at which the adjustment dial of your Apollo angle crimp tool is set.
- Take a screwdriver with a flat head or a similar tool and proceed to remove the C-clip that is located near the adjustment screw parallelly.
- Now, slide up the head of hexagon-shaped dial up to ¼ inches.
- You’ll now find a dial behind this hexagonal head which needs to be rotated until you align its head with your target diameter-size value.
- Finally, trace your steps back by pushing the hexagonal dial’s head downward, and replacing the C-clip to its initial position
4. How To Calibrate Apollo Quick Pinch Clamp Tool
- Take your calibration bar and place it between the jaws of your tool and close the handles until the jaws securely bite and hold on to the bar.
- Now, measure the gap of the jaws with the calibration bar to confirm if it lies within a range of 0.8-1.2 millimeters. If the gap is too small or large, it needs to be re-calibrated.
- Locate to the side of your Apollo pinch clamp tool and on the handle, find the locking screw.
- Loosen up this screw with any basic screwdriver.
- Now, proceed to find the adjustment screw and rotate it left or right in order to increase or decrease the jaw gap as necessary.
- Once you have reached your desired gap, tighten up the locking screw to secure the adjusted gap and you’re done.
5. How To Calibrate One Hand Pinch Clamp Fastening Tool
- Press the handles of your tool to close the jaws completely and hold.
- Measure the gap of the jaws with a calibration bar to confirm if it lies within a range of 0.8-1.2 millimeters. If the gap is too small or large, it needs to be re-calibrated.
- On the arm of your tool, locate the hexagonal screw.
- You now need an Allen wrench. This will be needed to lift up or lower down the screw at the bottom of this hexagonal screw.
- Raising the screw, which is done by turning it anticlockwise, will increase the gap between the jaws of your tool and vice versa.
Conclusion
Apollo no doubt provides some of the most versatile arrays of PEX tools, fittings, and more.
Their crimp tools are one of the most commonly used tools in both households and professional fields, which, when properly used and maintained, provide performance like no other brands.
Now that you have gone through our total guide on how to use the Apollo PEX crimp tool and know how to calibrate them as well, it will hopefully be a whole lot easier to make these your right hand when working with PEX tubing anywhere!
More Article For Plumbers:
- Ten Picks of The Torch for Soldering Copper Pipe
- Type of Solder for Copper Pipe
- Guidelines For Choosing A Pipe Thread Sealant
- Good Quality Insulation list For Pipe

Hey! I’m Leanda Bailey. I’m here to explain every plumbing installation and repair you may have in your kitchen or bathroom. Also, I’ll try to find you the best products on the market for your plumbing work.
